The shot is the image that appears on the screen when the camera is turned on, and Types of shots
vary depending on the size of the shot and the distance between the
camera and the scene, and also vary according to the angle of shooting,
as well as the direction and direction of the movement of the camera.
Each shot has a name and a familiar description between the director and the photography team, which facilitates the language of communication and guidance.
Each shot has a name and a familiar description between the director and the photography team, which facilitates the language of communication and guidance.
There are rules that are agreed upon by art production
experts, but can not be considered Muslim but are essentially subject
to the purpose for which they are designed
Types of shots
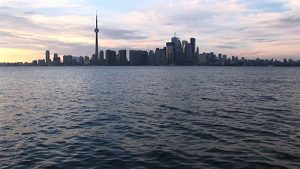
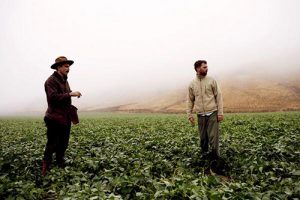
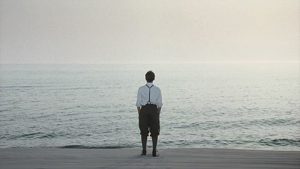
First: LONG SHOTS
It has 3 forms: Extreme Long Shot, Long Shot, and Medium Long Shot
Extreme
Long Shot is one of the types of shots that give an impression of the
location, geography, time of photography and the environment. The viewer
understands the surroundings and prepares to see the whole event.
This snapshot is often used as a Establishing or master shot, paving the way for the following shots and events and actions. The picture is large and wide, and most directors prefer to start the artwork with this shot.
In the long shot, the human body is full, and the medium long shot is measured in the person from the knee or waist to the head.
Extreme Long Shot Models


Long Shot Models
Medium Long Shot Models

Second: MEDIUM SHOTS
Is one of the
types of shots used to complete the establishment after the long shot,
and is used as a transition point between the long shot and the close
shot.
Is useful in demonstrating the development of interpersonal relationships.
Is useful in demonstrating the development of interpersonal relationships.
MEDIUM SHOTS Models


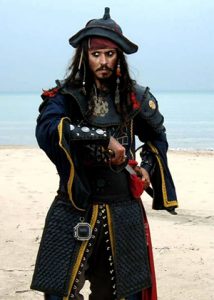
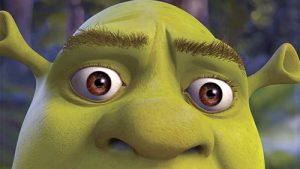
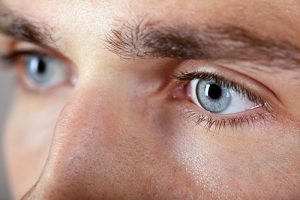
Third: CLOSE-UP SHOTS
It has 3 forms: Medium Close-up Shot, Close-up Shot, And an extreme close-up shot.
This type of footage is of relative importance, and has its characteristics, including:
Focuses on something relatively small, such as the human aspect or part of it.
As they inflate the size of the thing, they tend to raise its importance and emphasize it.
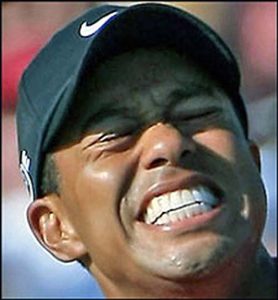
This snapshot suggests a symbolic meaning or an important moment within the drama context.
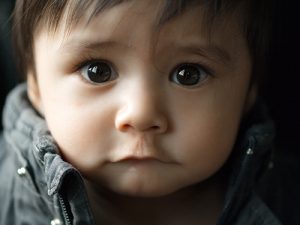
The medium-close shot usually includes the head and part of the chest, and is often used in the case of dialogue.
The close shot includes the head to show more facial features.
The close-up shot focuses on a part of the head, such as the eye, to show feelings or a part of the hand, such as sneezing.
Medium Close- up Shot Models


Close-up Shot Models

Extreme Close-up Shot Models
Types of camera movements
After reviewing the types of shots and models for each type we deal with the types of movements of the camera.
The camera has 3 ways to move:
Rotate the camera with the cradle fastness (rotate up, down, right, and left).
Move the camera stand (forward, backward, right, left, up, and down).
Move the camera lens (zoom in or out).
First: Rotate the camera:
The vertical movement is called a tilt-up, often suggesting ambition.
Vertical motion is called top-down tilt-down.
Pan Left (Pan means panoramic animation).
Horizontal movement is called Pan Right.
This movement is usually used to connect two objects, to look at a
metamorphic object such as a landscape, as a starting point for the
beginning of a work, and sometimes to use a two-shot jump.
Second Move the camera holder:
Moving the camera holder through wheels for pregnant women or
installing the camera on a cart or other, and this movement gives life
and vitality of the scene, which shows the depth of the scene, and give
the impression of the viewer moving in the scene.
Camera motion forward is called Dolly in.
The camera movement is called Dolly out.
Camera locations:
Interface mode: The camera in front of the person (or scene) is the most powerful and clear.
Put three quarters: between the side and the facade, and many of the directors preferred.
Side mode: The camera visualizes the person from the side.
Quarter Mode: Between Side and Back.
Rear mode: The camera behind the profile.
Types of angles of photography
First: Eye-Level Angle:
Is the most commonly used angle in television photography, where the camera angle is at the same level as the person.
Second: High Angle High Angle Shot
The camera is placed in a high angle, naturally raised, that does not
distort the view of the place, and may be placed on a natural crane or
high ground.
This angle is used to give the viewer a sense of the weakness of the
person being filmed and insignificant, as this angle suggests monotony
as it reduces the height of objects and slow motion.
Third: low angle Low Angle Shot:
The camera is placed at a low angle, so the viewer looks up, giving an
indication of the importance and position of the person who can be
placed in a dominant position.
Fourth: Canted Angle:
In
this shot, the vertical axis of the camera is tilted. This shot usually
takes place in scenes of violence, confusion, disaster, imbalance, loss
of emotional balance, or despair and sugar.
Comments
Post a Comment